

September 28, 2026
An effective employee welcome kit works in three layers: documentation, practical work items and one culture or branded piece. The best results come from a repeatable, tiered system, using print-on-demand for low-volume branded apparel so nothing sits unused in a storeroom. Poor onboarding deters a large majority of Australian employees from staying, and employers must supply the Fair Work Information Statement before or as soon as possible after a new starter begins.
TL;DR:
- Most kits should be ordered 10 to 14 business days before the start date for custom-branded items and 5 to 7 days for print-on-demand products.
- Sending a welcome email three to five days prior to the start date helps confirm delivery details and prepares the new hire for arrival.
- For remote employees, adapt all layers with digital documents and practical items that can travel easily by mail to ensure timely delivery.
- Use a three-tier system—budget, standard, and premium—with templates and print-on-demand for scalability and waste reduction.
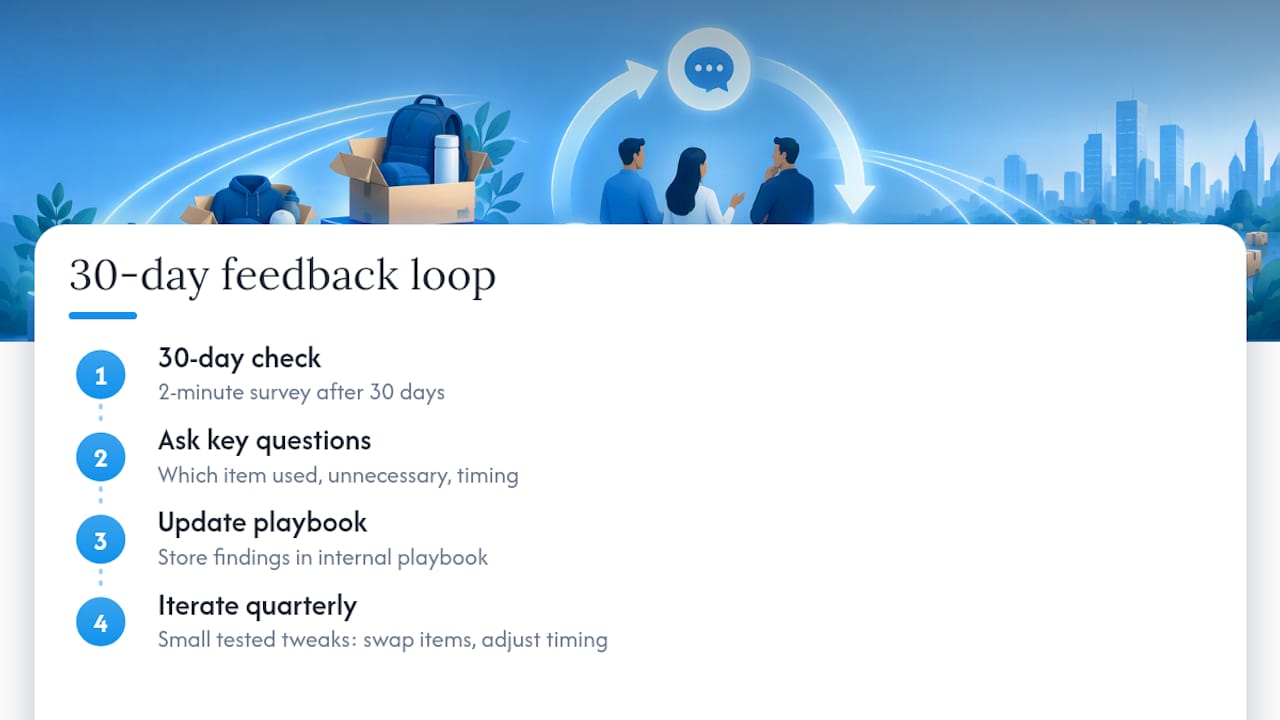
- Regular feedback from new hires after 30 days informs ongoing improvements, highlighting item usefulness and delivery timing.
Table of Contents
- What to include in a welcome kit: a checklist you can copy
- Build a three-layer system so kits scale without waste
- Sample kits by budget: what to include and what it costs
- Timing and logistics: getting kits there on time
- Vendor and ordering checklist for the branded layer
- How PromoShop can help with the branded layer
- Employee feedback mechanisms to improve future kits
- A practical note from running this system
- Get your welcome kits sorted with PromoShop
- Sources
- FAQ
What to include in a welcome kit: a checklist you can copy
A welcome kit only works when every layer earns its place. Skip the filler and build around three purposes: compliance, day-one readiness and belonging.
Documentation layer
- The Fair Work Information Statement, given before or as soon as possible after the start date.
- A first-week schedule with names, times and locations.
- A payroll and superannuation checklist, including TFN declaration steps.
Practical layer
- A notebook and pen for the first meetings.
- A charger, adaptor or dongle matched to the hire’s device setup.
- Role-specific tools: a security pass, a headset, or software log-in details.
Culture layer
- A short welcome letter from the manager or team.
- One well-made branded item, rather than several low-value trinkets.
- A one-page team introduction with names, roles and a friendly note.
Check consumables for dietary and allergy needs before you include snacks, and choose sustainably sourced items where you can. Our eco-friendly promotional products guide has options worth considering. Remote hires need every layer adapted for postage: digital versions of documents, and practical items chosen for how well they travel.
Build a three-layer system so kits scale without waste
Treat the welcome kit as a system, not a one-off task. Each layer maps to a different onboarding outcome, so build them separately and assemble them together.
- Documentation layer covers compliance and legal obligations, including the Fair Work Information Statement.
- Practical layer covers enablement, the tools that let someone start work without delay.
- Culture layer covers belonging, the piece that makes a new hire feel chosen rather than processed.
From there, set up three tiers: budget for high-volume or short-tenure roles, standard as your baseline for most hires, and premium for leadership or hard-to-fill positions. Use templates for the documentation layer, a print-on-demand storefront for sizing on the culture layer, and hold physical inventory only for practical items you reorder often.
Pro Tip: Write the whole system down as a one-page internal playbook, so any HR team member can run it without asking you first.
Sample kits by budget: what to include and what it costs
Every tier should feel intentional rather than scaled down. Here’s what each looks like in practice.
Budget kit
- A notebook, pen and a printed welcome letter, sourced from a local stationer or your own print run.
- One mid-range branded item, such as a printed tote or mug, ordered through print-on-demand to avoid holding stock.
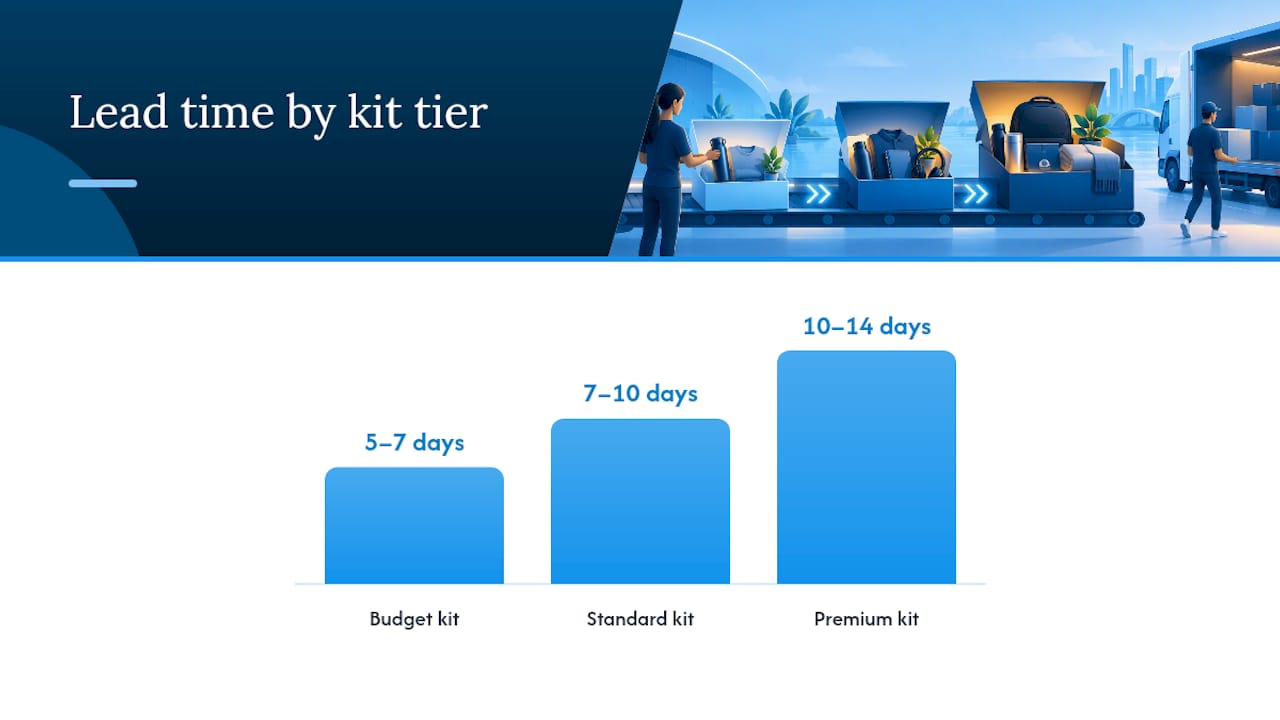
- Lead time: allow 5 to 7 business days for printing and delivery.
Standard kit (recommended baseline)
- Everything in the budget kit, plus a branded drink bottle or notebook set and a small confectionery item.
- For remote hires, add courier tracking and a note confirming delivery before the start date.
- Lead time: 7 to 10 business days to allow for customisation and shipping buffers.
Premium kit
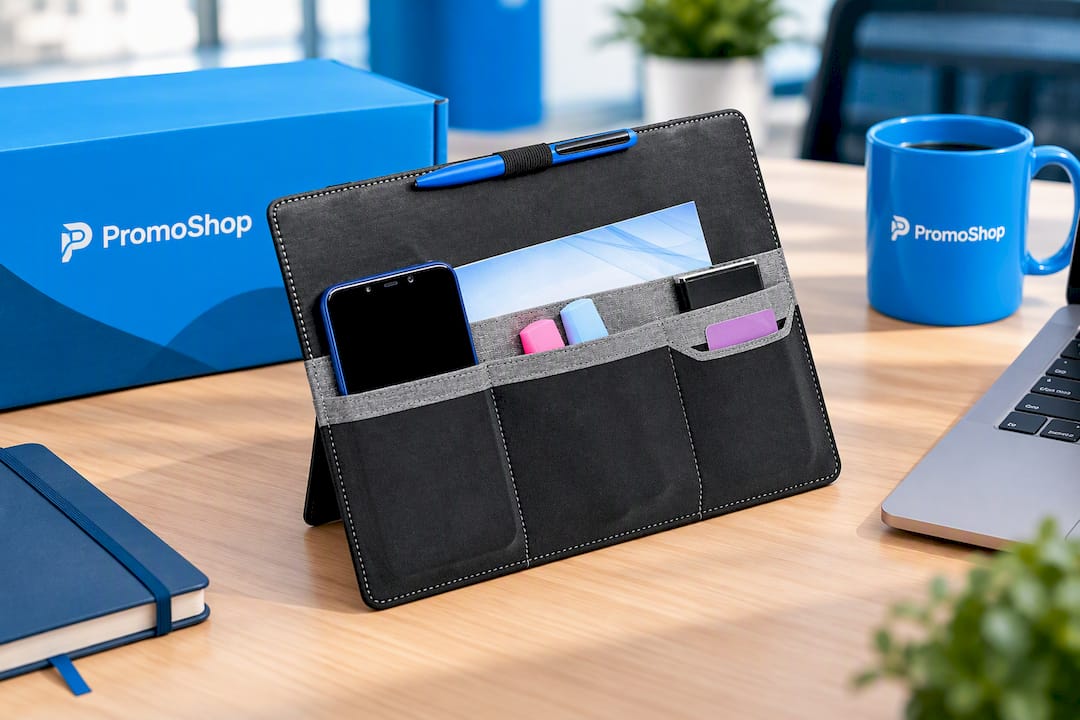
- A higher-quality branded item such as a padded organiser or premium drinkware set, alongside a handwritten note from the manager.
- Suited to leadership hires or roles with longer notice periods, where a slower turnaround is acceptable.
- Lead time: 10 to 14 business days, with margin built in for design approval and quality checks.
Build in a shipping buffer of at least two extra business days beyond the vendor’s quoted lead time, and confirm the new hire’s delivery address a week out rather than relying on details from the offer letter.
Timing and logistics: getting kits there on time
Timing failures are the most common reason a welcome kit arrives late or not at all. Work backwards from the start date.
- On offer acceptance, confirm the delivery address and start date immediately.
- Trigger the order 10 to 14 business days out for bulk or custom-branded items, or 5 to 7 days out for print-on-demand pieces.
- Send the welcome email 3 to 5 days before the start date, including what to bring and who to contact.
- Choose a fulfilment path: in-house assembly for full control, a third-party fulfilment partner for volume, or vendor-managed fulfilment when the supplier ships directly to the new hire.
- Verify addresses, check packaging survives transit, and plan a simple unboxing moment even for remote hires.
- Keep a size-exchange process ready for apparel, and account for customs timing on any international hire.
Vendor and ordering checklist for the branded layer
Before you commit to a supplier, ask the right questions and expect a straight answer.
- What’s the minimum order quantity, and can you print-on-demand below it?
- What’s the standard lead time, and what’s the rush option?
- Do you warehouse stock, or ship direct per order?
- What’s your sample policy, and can I see one before I commit to a run?
- What’s your returns and size-exchange process for apparel?
Expect setup fees for first-time branding, per-item pricing that drops at higher volumes, and shipping charged separately unless the vendor bundles it. Some suppliers offer free design services or a price-beat guarantee, which is worth asking about directly.
Pro Tip: Always request a physical sample before a full run: colour and print quality can look different on screen.
How PromoShop can help with the branded layer
PromoShop has extensive experience sourcing promotional products, using factory-direct supply to keep quality consistent and pricing competitive. For HR teams building the culture layer, that means:
- Free artwork design services to assist with branding.
- A price beat guarantee on products, useful when comparing quotes across suppliers.
- Express service options for kits that need to move fast, including last-minute starts.
For remote hires, the Remote Work Organiser is a practical culture-layer item that doubles as a genuinely useful desk tool rather than a throwaway extra. Browse the full range of branded merchandise to see options across drinkware, apparel and corporate gifts.
Employee feedback mechanisms to improve future kits
A welcome kit that hasn’t been reviewed in a year is a guess, not a system. Ask new hires directly, ideally at the 30-day mark once the excitement has settled and they’ve had time to actually use everything you sent.
A short, two-minute survey works better than a long form. Ask which item they used most, whether anything felt unnecessary, and whether the timing worked. A significant share of workers decide whether the job is right within their first month, so feedback gathered early tells you whether the kit is doing its job during the window that matters most.
Feed results into your internal playbook rather than letting them sit in a spreadsheet. If three hires in a row mention the notebook went unused, swap it for something else next quarter. If remote hires consistently flag late delivery, that’s your cue to move the trigger point earlier. Treat the kit as something you refine every few months, not something you set once and forget.
Small operational tweaks, tested against real feedback, matter more than adding extra items. A kit with four things people actually use beats one with ten things nobody opens twice.
A practical note from running this system
Standardise the layers, tier by role, and automate the branded piece through print-on-demand: that combination is what makes welcome kits sustainable for a small HR team. One quick win worth trying immediately: send the welcome email 3 to 5 days early with a link to a print-on-demand storefront so the new hire picks their own size before day one.
— SEO
Get your welcome kits sorted with PromoShop
Once you’ve settled on your three-layer system, the branded piece is usually the hardest part to execute without holding stock or chasing suppliers. PromoShop handles that layer directly: factory-direct sourcing keeps costs down, free artwork design means you don’t need a designer on staff, and express service covers the kits that need to move fast.
This suits HR teams hiring in small, irregular batches just as well as those onboarding in bulk, since orders are quote-driven rather than tied to large minimums. If you’re ready to build your culture layer, explore PromoShop’s full product range and get a quote for your next intake.
Sources
- Bad onboarding a deal breaker for 7 in 10 employees; new focus on employee experience for SMEs — MYOB
- Fair Work Information Statement — Fair Work Ombudsman
- Workers quit during probation period — ELMO Software newsroom
- Employee onboarding checklist Australia — ScaleSuite
FAQ
What are some ideas for an employee welcome kit?
Good ideas split across three layers: documentation like the Fair Work Information Statement, practical items such as a notebook or charger, and one well-made branded piece like a drink bottle or the Remote Work Organiser. Match the tier to the role rather than sending the same kit to everyone.
What should a new employee kit include?
At minimum, a kit should include compliance documents, a first-week schedule, and the practical tools needed to start work without delay. Add one branded item and a short welcome note to cover the belonging piece, and adapt contents for remote hires so everything travels well by post.
What are the 5 C’s of employee onboarding?
Definitions vary across HR sources, but a common version covers compliance, clarification, culture, connection and check-back. A welcome kit primarily supports the compliance, culture and connection elements, while check-back is better handled through feedback surveys after the first month.
What to include in a staff welcome pack?
A staff welcome pack should cover the same three layers as any welcome kit: legal and payroll documentation, practical work items, and a culture touchpoint such as a branded gift or handwritten note. Structured onboarding is linked to stronger retention outcomes, so treating the pack as more than a formality is worth the extra planning.
When should I send a welcome kit before someone starts?
Trigger custom or bulk orders 10 to 14 business days before the start date, and print-on-demand items 5 to 7 days out. Send the welcome email 3 to 5 days before day one, including delivery confirmation and what to expect on arrival.