


September 30, 2026
For sharp, professional prints, use 300 dpi at the final print size. This works for most photos, brochures and everyday branded items. Small or archival pieces may need 600 dpi, and very large banners can look great at much lower dpi thanks to viewing distance. Before you upload anything, check three things: pixel dimensions, file format and colour mode.
TL;DR:
- Using 300 dpi for most prints, including brochures and branded items, ensures a sharp appearance unless the print is very small or archival, which may require 600 dpi.
- Printable image quality depends on pixel dimensions and file resolution; enlarging a low-resolution image will cause it to look soft or pixelated, regardless of printer capability.
- For up-close, detailed prints like logos or small items, 600 dpi is recommended, while large banners viewed from a distance can often be printed at much lower dpi with acceptable clarity.
- Common mistakes include submitting low-resolution images stretched past their effective print size, and failing to use CMYK or include bleed marks, which can lead to colour shifts and cropping issues.
- A quick preflight check of pixel dimensions, color mode, and bleed before uploading can prevent reprints and delays, and professional printing services often offer free artwork review to catch these issues.
Table of Contents
- What DPI and PPI actually mean for your files
- What DPI target should you use for your print job
- How to check your image’s resolution before you print
- Preparing files the way print providers expect them
- Printer settings versus file DPI: who’s responsible for what
- What we see go wrong with customer artwork
- How PromoShop turns your artwork into a finished print
- Sources
- FAQ
What DPI and PPI actually mean for your files
DPI and PPI get used interchangeably, but they measure different things. Getting this right helps you read file properties and printer settings correctly.
- PPI (pixels per inch) describes the pixel density inside your digital image file.
- DPI (dots per inch) describes how many ink or toner dots a printer lays down per inch of paper.
Your printer’s dot density and your image’s pixel count work together, not separately. A printer can be capable of a high DPI, but if your image only has a small number of pixels, those dots are just reproducing a blown-up, blurry version of what’s there. Resolution is measured in PPI for digital images and DPI for print, and low resolution in either shows up as unfocused, pixelated output.
Here’s a simple example. Say you have an image that’s 900 pixels wide. At 300 PPI, that image can print at 3 inches wide and stay sharp. Try to print it at 10 inches wide and the pixel density drops to 90 PPI: the pixels themselves become visible, and the print looks soft or blocky. Pixels are the hard limit. No printer setting can add detail that isn’t already in the file.
What DPI target should you use for your print job
Different jobs call for different resolution targets, and viewing distance matters as much as the number itself.
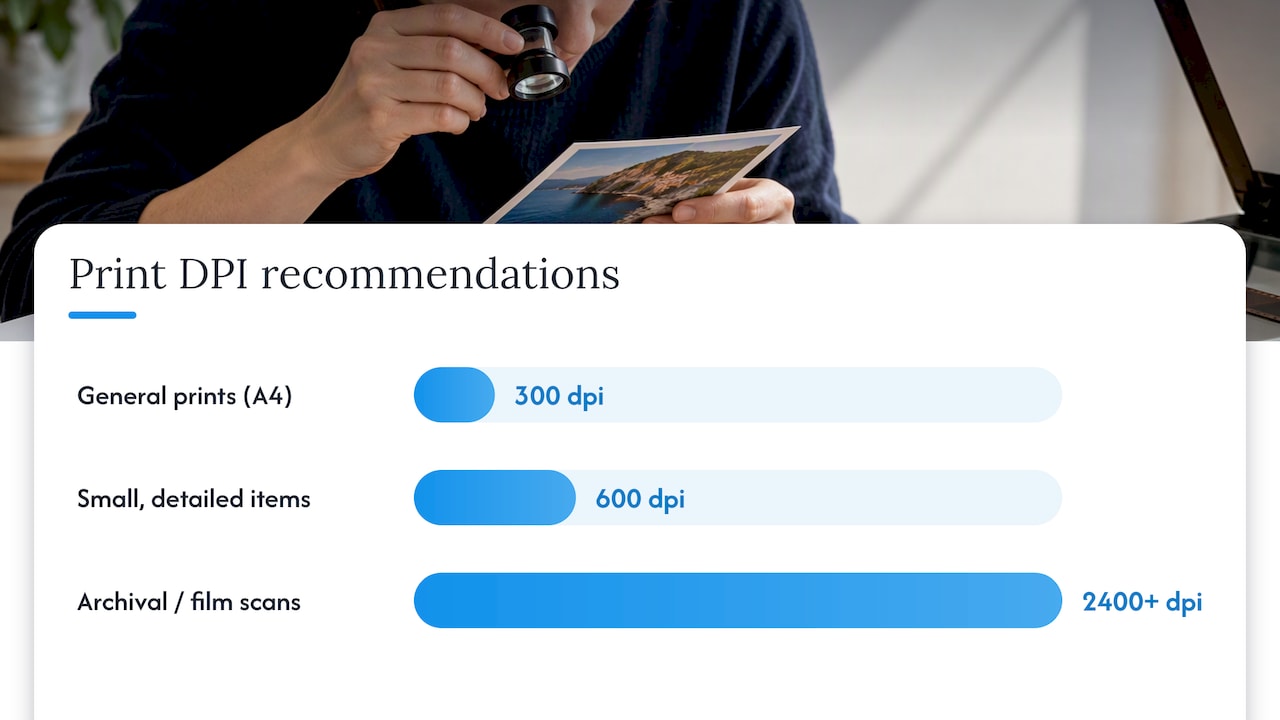
- 300 dpi suits most photographic prints, brochures and standard-sized branded items, matching what university printing guidance recommends for A4 pages.
- 600 dpi suits small items and detailed scans, where fine text or intricate logos sit close to the eye.
- Very high dpi (upward of 2400 dpi) suits film, negatives or archival scans that may be enlarged later.
Government and library digitisation standards set minimum scanning resolutions of 300 dpi for general material and 600 dpi for small, detailed items, according to Western Australian state records specifications. These minimums are a useful benchmark even outside formal archiving.
Material and distance change what you actually need. A small branded item held in the hand, like a keyring or a pin, benefits from that higher 600 dpi detail because eyes are close and scrutinising. A large format banner viewed from across a room or trade floor can look crisp at a much lower effective dpi, because distance smooths out what would otherwise be visible dot patterns on fabric or vinyl.
How to check your image’s resolution before you print
Before you commit to a print size, run a few quick checks in whatever software you’re using.
- Check pixel dimensions and PPI in your image editor’s document or image size panel, or in your operating system’s file properties.
- Use the formula: pixels ÷ desired print inches = PPI. Compare the result to 300.
- View the file at 100% on screen. If it looks soft at that zoom level, it will look soft printed too.
- Check the file format and compression. Heavily compressed JPEGs can look fine on screen but print with visible artefacts.
Worked example: your image is 1800 pixels wide, and you want to print at 6 inches wide. 1800 ÷ 6 = 300 PPI, right at the standard target. If you wanted to print that same image at 12 inches wide, you’d only get 150 PPI, below the recommended threshold for a crisp result.
Pro Tip: If an image falls short of 300 PPI at your target size, reduce the print size rather than stretching the file: a smaller, sharp print beats a larger, soft one.
Preparing files the way print providers expect them
Print-ready files need more than the right pixel count. A few preparation steps prevent rework and colour surprises once a job hits the press.
- Resample only when necessary, and know that upsampling (adding pixels to a smaller image) can’t recover detail that was never captured. It’s a last resort, not a fix.
- Supply CMYK files or embed an ICC profile for commercial printing, since university guidance on image preparation recommends CMYK specifically to keep colours accurate on press
- Use 8-bit or higher colour depth where your software allows it, to avoid banding in gradients.
- Choose TIFF, PDF or PDF/X, or a high-quality JPEG for final delivery, and build in bleed and trim marks so nothing gets cropped unexpectedly.
Printer settings versus file DPI: who’s responsible for what
A printer’s maximum DPI capability describes ink dot density: it doesn’t add missing pixels to your file. If your image is low resolution, a high-end printer just reproduces that low resolution more precisely.

Where printer settings do matter is in draft, standard or high-quality modes, which affect how much ink is laid down and how long the job takes. A high-quality setting on a well-prepared file gives you the best result the press can offer. On a low-resolution file, it just uses more ink to print the same soft image.
When briefing a print provider, state your final size and material, and always ask for a proof before a full run.
What we see go wrong with customer artwork
The same handful of mistakes account for most reprints and delays we see. Catching them before you order saves time on both ends.
The most common issue is a low-resolution image stretched well past its comfortable print size: it looks fine as a thumbnail but turns soft or pixelated once enlarged. Close behind is submitting files in RGB when a job needs CMYK, which can shift colours on press. Missing bleed is another regular one: without it, trimming can clip a logo or edge design.
A quick preflight before you upload helps: confirm your pixel dimensions match your target size at 300 dpi (or 600 dpi for small items), confirm the colour mode, and confirm bleed is included.
This is why some print providers include free artwork design services to check files and flag resolution or colour issues before production, and offer expedited options to help when turnaround is tight.
— PromoShop
How PromoShop turns your artwork into a finished print
You don’t have to run every DPI calculation yourself. A free artwork design service can check your files against the requirements for your chosen product, catching resolution and colour issues before printing. Combined with a price beat guarantee and express service options, this approach can reduce surprises and speed turnaround.
Different products call for different file prep, and we map the advice above to what we produce:
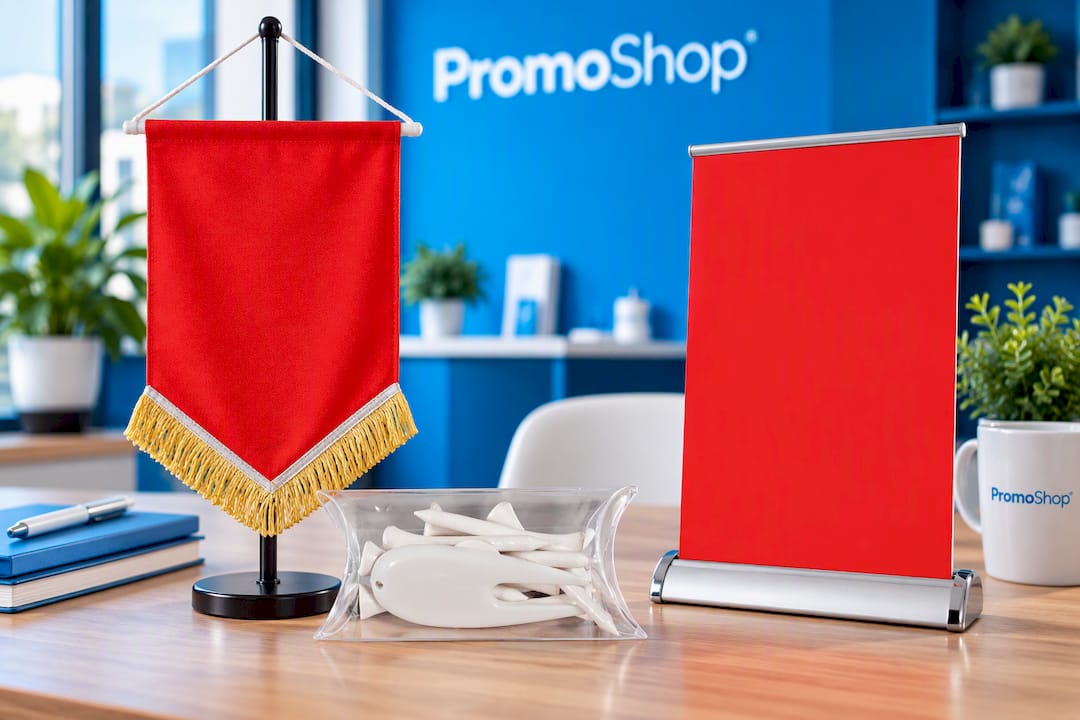
- Table Top Pull Up Banners are large format, so viewing distance does a lot of the work, and file requirements are more forgiving than a handheld item.
- Pennants and the Pillow Pack – Standard Tee Pack are viewed up close, so sharper source files matter more for logos and fine text.
Browse our printing options or check our branding guide for placement advice, and see the full range at PromoShop to get a quote.
Sources
This guide draws on Australian government digitisation specifications and university and library resources, including the Western Australian digitisation specification, University of Wollongong image guidance, and Melbourne Polytechnic’s visual literacy guide. For formal archival or technical projects, consult these sources directly. For budget trade-offs on large runs, this guide to balancing cost and technical quality is a useful reference.
- Specification for digitisation of state records
- Creating and editing image files - University of Wollongong
- Evaluate images - Visual Literacy - Melbourne Polytechnic
FAQ
Is 600 or 300 dpi better for print quality?
Neither is universally better: 300 dpi is the standard for most photographic prints and everyday branded items, while 600 dpi suits small items or detailed scans viewed up close. Choose based on the item’s size and how close viewers will get to it.
Which is clearer, 300 dpi or 1200 dpi?
At typical print sizes, files with very high dpi rarely look clearer than 300 dpi to the naked eye, since most printing processes and viewing distances don’t resolve the extra detail. Very high dpi mainly matters for film, negatives or archival scans that may be enlarged later.
How do I change the DPI on my printer?
Printer DPI settings are usually found under print quality or print mode in your printer driver, often labelled draft, standard or high quality. Raising this setting improves output only when your source image already has enough pixels to support it.
How can I convert an image to DPI?
You can’t add real detail by changing DPI alone: resampling to a higher DPI without more pixels just stretches existing information across new pixels, which visual literacy guidance confirms produces unfocused results. The better approach is to capture or source the image at the highest quality available from the start.